Hello fellow bloggers!
What is Blogging?
Have you ever wanted to start your own blog and share your thoughts, opinions, hobbies, or passions with the world? If so, you’re not alone. Millions of people around the world have blogs and enjoy the benefits of blogging, such as:
- Expressing yourself creatively and authentically
- Connecting with like-minded people and building a community
- Learning new skills and gaining knowledge
- Earning money from ads, sponsorships, or products
In today’s digital age, blogging has emerged as a powerful tool for individuals and businesses alike to share ideas, connect with audiences, and drive organic traffic.
Blogger (aka, blogspot) is an old but free and user-friendly platform provided by Google that offers a seamless way to create and manage your blog without the complexities of web development.
How does Blogger Compare to Other CMS
Blogger is one of the oldest and a popular blogging platforms in the world. It was launched in 1999 by Pyra Labs and acquired by Google in 2003. Since then, it has grown to host millions of blogs in various languages and niches.
Blogger is a free blogging platform owned by Google that lets you create and host a blog in a few simple steps. You don’t need any technical skills or experience to use Blogger. All you need is a Google account and an internet connection.
Advantages of Blogger CMS
There are also many advantages that make Blogger a great choice for beginners and hobbyists:
- It’s free. You don’t have to pay anything to use Blogger.
- You can create as many blogs as you want without any limitations.
- It’s easy. You can create and manage your blog with just a few clicks. You don’t need any coding or design skills to use Blogger.
- It’s secure. You don’t have to worry about hackers or malware. Your blog is hosted on Google’s servers, which are reliable and safe.
- It’s integrated. You can use your Google account to sign in and access other Google services, such as Gmail, Drive, Photos, Adsense, Analytics, etc.

Table of Contents
Why Blogger Settings Matter
Have you ever felt that navigating the backend of your Blogger site is a bit of a maze? Wondering how to truly make your blog shine, perform better, and get noticed by search engines like Google, Bing, Yandex?
We know getting your blog just right is super important. By tweaking the setting options, you can seriously boost your blog’s performance, make it a joy for your readers, and even help it climb those search engine rankings.
That’s why we have put together this complete blogger settings guide – your single, go-to resource consolidating everything essential about Blogger settings. Think of this as your friendly walkthrough of the nuts and bolts that help your blog run smoothly, look fantastic, and climb those search rankings.
Whether you’re a complete beginner using Blogspot settings for the first time or a seasoned blogger looking to optimize Blogger settings, we have got you covered.
By understanding and tweaking these options, you can significantly improve your blog’s performance, enhance your readers’ experience, and boost your SEO.
So, let’s dive into mastering Blogger (blogspot) settings together.
What Settings Does Blogger Encapsulate
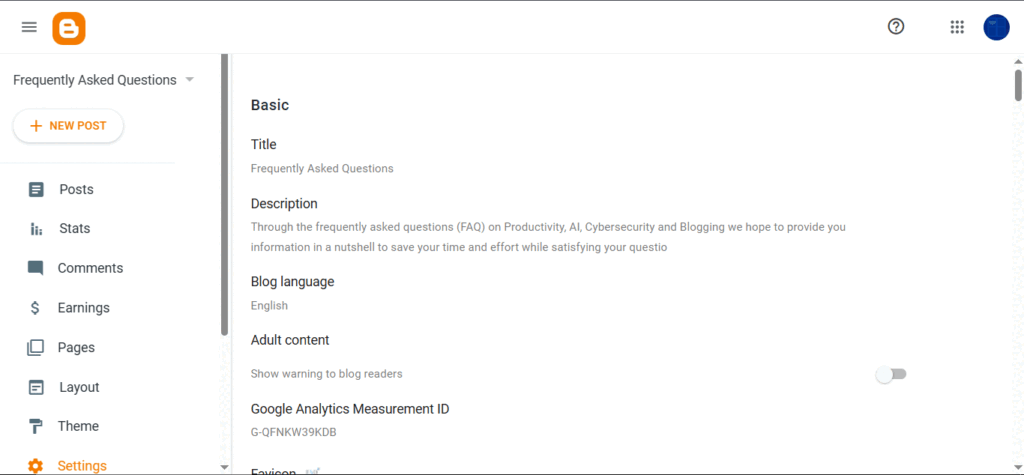
Here’s what we’ll cover in this blogger ultimate settings:
- Publishing: Your blog’s address (URL) and custom domain options.
- HTTPS: The crucial step for a secure blog.
- Permissions: Who can view, write, and comment.
- Posts: How your content is displayed on the main page and feeds.
- Comments: Managing reader interaction and preventing spam.
- Email: Notifications and posting directly from your inbox.
- Formatting: Language, time zones, and date/time appearance.
- Search Description (Meta Tags): Telling search engines what your blog is about.
- Errors and Redirects: Handling broken links gracefully.
- Crawlers & Indexing (Technical SEO): Guiding search engine bots.
- Monetization: Options for earning revenue (like AdSense).
- Manage Blog: Importing, exporting, deleting, and restoring.
- Layout: Arranging visual elements and adding functionality (Gadgets/Widgets).
- Theme: Customizing the overall look and feel (Blogger Template Designer).

Publishing Settings
This section handles your blog’s core online identity – its web address.
- Blog Address: This is your blog’s default URL (e.g., yourblogname.blogspot.com). You can attempt to change it here, but remember it needs to be unique. A memorable and relevant address is always a good idea. Blogger will check availability as you type.
- Custom Domain: Want a more professional address like www.yourblogname.com? If you own a custom domain (or buy one from a domain registrar), this is where you connect it to your Blogger blog. This is highly recommended for branding.
- Redirect Blog: If you need to permanently send visitors from your Blogger URL to a completely different website address, you can set up that redirect here.
- Blog Transfer: If you’re passing your blog onto someone else, you can initiate the ownership transfer here. Just enter the recipient’s Google account email. They’ll need to accept the invitation.
HTTPS Settings
Security online is non-negotiable! HTTPS encrypts the connection between your readers’ browsers and your blog, making it secure and trustworthy.
- HTTPS Availability: This should absolutely be set to Yes. It changes your address to https:// and is a critical security measure. Google heavily favors secure sites, so enabling this is essential for Blogger SEO.
- HTTPS Redirect: Set this to Yes as well. It ensures anyone trying to visit the old http:// version is automatically redirected to the secure https:// version.
- Security Best Practices Beyond HTTPS: While enabling HTTPS is vital, securing your blog involves more. Factors like using a strong password for your Google account, carefully managing who has author permissions, and being aware of potential phishing attempts are also important. You can explore Essential Blogger Security Tips for more information.

Permissions Settings
Control who has access to view, contribute to, and interact with your blog.
- Blog Readers: Choose the visibility:
- Public: Anyone on the internet can find and read your blog.
- Private – Only blog authors: Only you and other invited authors can view it.
- Private – Only these readers: Only specific people you invite via email can access the blog.
- Blog Authors: This lists everyone who can create or edit posts. You can invite new Blog Authors (who can usually edit their own posts) or Administrators (who can edit any post and manage settings) by email. You can also remove access or change roles here. Be cautious about who you grant administrative access to!
- Comment Moderation: Decide if you want to approve comments before they appear publicly. Options include Always, Sometimes (for comments on older posts after a set number of days), Never, or Only on posts older than…. Moderation is a key tool for preventing spam and maintaining a positive comment section.
- Comment Notification Email: Enter one or more email addresses (separated by commas) to receive notifications whenever new comments are submitted (especially if moderation is enabled).
Posts Settings
Configure how your individual blog posts are displayed and managed.
- Show at most: Here you can set the maximum number of posts (or days’ worth of posts) to display on your homepage. Be mindful that showing too many posts can slow down your homepage loading speed, impacting user experience and potentially SEO. Fewer posts generally mean faster loading.
- Post Feed Redirect URL: If you use an external feed service (like Feedburner), you can enter its URL here to redirect your blog’s default RSS/Atom feed.
- Allow Blog Feed: Control how much content appears in your blog’s feed (used by feed readers). Options are: Full (entire post), Short (a snippet), Until Jump Break (content before your “Read More” break), None, or Custom.
- Showcase images with Lightbox: Setting this to Yes provides a better viewing experience for images. When clicked, images will enlarge against a dimmed background.
- Show location for this post: Enable this if you want the option to add a geographic location (via Google Maps) to your individual blog posts.
- Impact of Settings on Blog Performance: We noted how post count affects homepage speed. Many settings subtly influence performance – from feed configurations impacting server requests to gadget usage affecting load times. We’ll explore the broader topic of optimizing your Blogger blog’s performance in a dedicated future post.

Comments Settings
Manage the conversation happening on your blog posts.
- Who Can Comment: Choose your audience: Anyone (offers various ways to identify, including anonymous), Registered User (requires login from various platforms like Google, OpenID), User with Google Accounts, or Only members of this blog. Allowing “Anyone” might increase engagement but also potentially spam.
- Comment Moderation: As mentioned in Permissions, set your approval rules here.
- Comment Form Placement: Where does the comment box appear? Embedded below the post (most common), on a Full Page, in a Pop-up Window, or Hide it completely.
- Comment Form Message: Add a custom note above the comment form (e.g., “Please keep comments respectful and on-topic.”).
- Word Verification: Enabling this (often called CAPTCHA) makes users solve a small puzzle to prove they’re human. It’s highly effective at blocking automated spam prevention bots, though it adds a small step for real commenters.
- Show comment word count: Optionally display how long each comment is.
Email Settings
Manage notifications and the unique ability to publish posts via email.
- Post using email: Configure a secret email address. Sending an email to this address from your registered account can create a new blog post. The subject line becomes the title, the email body becomes the content. You can even add special codes to the email address to publish immediately, save as a draft, or schedule the post.
- Comment Notification Email: (Covered in Permissions) Set where comment notifications are sent to.
- Posting using email: Simple toggle (Yes/No) to enable or disable the feature described above.
- Deeper Dive into Email Posting and Notifications: The email posting feature has some nuances, like handling attachments and scheduling codes. Check Unlock Blogger Email Posting and Notification Settings to learn about the settings.
Formatting Settings
Control language, time, and date displays to match your audience and location.
- Language: Select the primary language for your blog. This affects the Blogger interface language and is a basic but important step for accessibility.
- Time Zone: Set the correct time zone for your location. This ensures post and comment timestamps are accurate.
- Date Header Format, Timestamp Format, Comment Timestamp Format, Archive Index Date Format: Choose how you want dates and times displayed across different parts of your blog (e.g., “April 5, 2025” vs. “05/04/25”).
- Show dates in order of: Customize the order (e.g., Day/Month/Year vs. Month/Day/Year).
Search Description (Meta Tags) Setting
This is a crucial setting for Blogger SEO.
- Description: Enable this and write a concise, compelling summary (around 150-160 characters) of what your entire blog is about. Include relevant keywords. This Search Description often appears as the snippet below your blog’s title in Google search results, influencing whether people click through.
Errors and redirects Settings
Manage broken links effectively for better user experience and SEO.
- Custom Page Not Found: Don’t leave visitors hitting a dead end! Enable this to create a custom message for your 404 error page (the page shown when a URL doesn’t exist). Include a friendly apology and suggest navigating back to the homepage or using search.
- Custom Redirects: If you’ve changed the URL of a post or deleted one, use this feature to automatically send visitors (and search engines) from the old URL to a new, relevant one. You can set up custom redirects individually. Marking them as “Permanent” (a 301 redirect) tells search engines the move is permanent and helps transfer SEO value.
- For Example: If you have to change the URL of your old post/page from https://yourblogname.com/p/from-old-blogpost.html to https://yourblogname.com/p/the-new-blogpost.html, you can use the Custom redirects setting to redirect users who try to access the old URL but are sent to the new URL.
Note: You only need to enter the part of the URL that comes after your blog name. Which means, /p/from-old-blogpost.html in the “To” box and /p/from-old-blogpost.html in the “From” box.
Crawlers & Indexing: Key Technical SEO Settings
This section contains vital technical SEO settings for telling search engines how to interact with your blog.
- Enable custom robots.txt: Definitely set this to Yes. This allows you to create a robots.txt file. Configuring your custom robots.txt is crucial for Blogger technical SEO, as it guides search engine crawlers (like Googlebot). You can tell specific User-agents which parts of your site not to crawl (Disallow). A common use is Disallow: /search to prevent indexing of your internal search result pages (often considered low-quality/duplicate content). You should also specify the location of your sitemap here (e.g., Sitemap: https://yourblogname.com/sitemap.xml).
User-agent: *
Disallow: /search
Allow: /

Sitemap: https://www.[your blog name.extension]/atom.xml?redirect=false&start-index=1&max-results=500- Enable custom robots header tags: Enable this (Yes) to control indexing and link following on a page-type basis using custom robots header tags. Think of robots.txt as rules for the whole building, and header tags as ‘Do Not Disturb’ signs on specific room doors. You’ll see options for:
- Home page tags: Usually set to all (allow everything).
- Archive and search page tags: Often set to noindex, follow or noindex, nofollow. noindex prevents these pages (which often just lists post snippets) from cluttering search results and potentially causing duplicate content issues. follow allows Google to still discover posts linked from these pages.
- Post and page tags: Usually set to all (allow indexing and link following for your actual content). You can also use tags like noarchive (prevent cached version) or nosnippet (prevent snippet in results), but all is standard for content pages.
- Meaning of the tags:
- all – This means that there are no restrictions for indexing or serving your home page. This is the default value and has no effect if explicitly listed.
- noindex – This means that you don’t want your home page to show up in search results and don’t want a “Cached” link in search results.
- nofollow – This means that you don’t want search engines to follow the links on your home page.
- none – This is equivalent to noindex, nofollow.
- noarchive – This means that you don’t want a “Cached” link in search results for your home page.
- nosnippet – This means that you don’t want a snippet in the search results for your home page.
- noodp – This means that you don’t want search engines to use metadata from the Open Directory Project for titles or snippets shown for your home page.
- notranslate – This means that you don’t want search engines to offer translation of your home page in search results.
- noimageindex – This means that you don’t want search engines to index images of your home page in search results.
- unavailable_after: [RFC-850 date/time] – This means that you don’t want your home page to show up in search results after the specified date/time. The date/time must be specified in the RFC 850 format.

Monetization Settings
If you plan to earn revenue directly from your blog content.
- Show ads on blog: Toggle this to Yes to enable displaying Google AdSense advertisements.
- Sign up for AdSense: Use this link to connect your blog to a new or existing AdSense account. Approval is required.
- View Dashboard: Access your AdSense account to manage ad settings, view performance reports, and check earnings.
- Integration with Other Google Services Beyond the Basics: AdSense is just one piece. To truly understand your blog’s health and audience, integrating with Google Search Console (essential for submitting your sitemap, monitoring crawl errors, and seeing search queries) and Google Analytics (for detailed traffic sources, user behavior, and content performance) is highly recommended. We’ll guide you through setting up and leveraging these powerful free tools in a future post.

Manage blog Settings
Administrative tools for your blog’s content and overall existence.
- Import Content: Bring in posts and comments from another blogging platform (requires a specific file format).
- Export Content: Create a backup file of all your posts and comments. Useful for safekeeping or migrating platforms.
- Delete Blog: Permanently removes your blog. Use with extreme caution! Blogger provides a 90-day grace period during which you might be able to restore it.
- Undelete Blog: If you’ve deleted your blog within the last 90 days, this option might appear, allowing you to attempt restoration.
Layout Settings in Blogger
This is your control panel for visually arranging the different elements (like sidebars, headers) and adding functional components (Blogger gadgets or widgets) to your blog.
- Accessing: Find Layout in the main dashboard sidebar.
- Understanding Sections: The layout page shows distinct areas (Header, Sidebar, Footer, Main Post Area, etc.) where you can place elements.
- Adding Gadgets (Widgets): Click Add a Gadget within a desired section. Choose from a list of built-in functions (e.g., Search Box, Profile, Blog Archive, Labels/Categories, HTML/JavaScript for custom code, Popular Posts, Followers). Configure the specific gadget’s settings (like title) and save. Adding relevant gadgets enhances user navigation and functionality.
- Removing Gadgets (Widgets): Click Edit on the gadget you want to remove, then find and click the Remove button in its configuration window.
- Rearranging Gadgets (Widgets): Within a section, click Edit and use the arrows or drag-and-drop functionality to change the order. You can also drag gadgets between different sections (e.g., move the search bar from the sidebar to the header).
- Editing Settings: Use the Edit link on each gadget to modify its specific options.
- Related Post Reminder: For more on how specific gadgets impact usability and on-page SEO, check out our future guides. And, check out our guide on Master On-page SEO Like A Pro for how the content within these layouts should be optimized.
Theme Settings in Blogger
Control the overall visual design – the look, feel, colors, and fonts – of your blog using the Blogger Template Designer or by uploading custom themes.
- Accessing: Click Theme in the dashboard sidebar, then Customize.
- Choosing a Layout (via Template Designer): Select from Blogger’s built-in base layouts (Simple, Dynamic Views, etc.). Consider their descriptions and preview them. Most newer Blogger themes offer responsive design, adapting reasonably well to mobile devices.
- Customizing Colors and Fonts (via Template Designer – Advanced): Use the “Advanced” section to fine-tune colors (backgrounds, text, links, titles) and fonts (type, size, style) for nearly every element, helping you match your brand identity.
- Adjusting Widths (via Template Designer): Modify the width of your main content area and sidebar(s) using sliders.
- Adding/Removing Elements (via Template Designer): Check/uncheck boxes to control the visibility of the main header, footer, and navigation menu bars.
- Previewing Changes: Always use the Preview button before saving to see how changes look live, including on different screen sizes (desktop, mobile).
- Publishing/Saving: Click Save (usually an icon in the corner) within the Template Designer to apply your customizations.
- Restoring/Uploading: On the main Theme page, the dropdown next to “Customize” allows you to Restore a previous version (if backed up) or upload a theme file (.xml) you downloaded from elsewhere (like pre-designed Blogger templates from third-party sites).
- Related Post Reminder & Advanced Path: Using the Blogger Template Designer offers significant customization. For unique looks or more advanced features, consider exploring pre-designed Blogger templates. We have a whole guide on finding and installing them.
For ultimate control, advanced users can edit the theme’s HTML/CSS directly via the “Edit HTML” option on the Theme page [use with caution and always create a backup (export content) before accessing these settings].
Video Resource
A video tutorial from C M Manjunath explaining the settings for Blogger is surely going to make the settings simpler.
Conclusion
Well Finally! We’ve journeyed through the essential landscape of Blogger settings in this complete guide. As your single go-to resource, we hope you now feel empowered to configure your blog effectively.
Blogger is a great platform for beginners who want to start a blog quickly and easily. However, it also requires some optimization to make it more visible and attractive for search engines and users.
Taking the time to optimize Blogger settings isn’t just about ticking boxes; it’s about improving performance, creating a welcoming space for your readers, boosting your SEO, and truly mastering Blogger.
Key Takeaways to Remember:
- Always create a backup (export content) before accessing these settings
- Always enable HTTPS for security and SEO.
- Use Robots.txt and Header Tags wisely to guide search engines.
- Customize Layout and Theme to reflect your brand and improve user experience.
- Configure Permissions and Comments to manage interaction and spam.
- Don’t forget the Search Description (Meta Tag) for better search visibility
- Make sure to save your changes after you modify any settings
Remember those areas we marked for a deeper dive? Keep an eye out for upcoming, detailed posts linked from here covering crucial topics like Security Best Practices Beyond HTTPS, Blog Performance Optimization, Advanced Email Features, and Leveraging Google Service Integration.
Hope, we have been able to navigate the maze of Blogger Settings with clarity! So, log in to your Blogger dashboard, explore these settings with confidence, and don’t be afraid to experiment.
If you have any feedback about this post, please leave a comment below.
We would love to hear from you. And if you liked this post, please share it with your friends.
Happy blogging!
